Document Analysis by Iterative Training with Paco Classifier

This page demonstrates steps to perform iterative training using background_removal, Pixel_js, Training model of Patchwise Analysis of Music Document, Training, and Training model of Patchwise Analysis of Music Document, Classifying. Overall, the iterative training process contains the following steps:
- (Iteration 1) Annotate layers with
background removalandpixel. - (Iteration 1) Use
Paco Trainerto generate models with the image and layers you just annotated. - (Iteration 1) Send the generated models and new image to
Paco Classifier. The classifier predicts layers of this new image for you. - (Iteration 2+) Correct predicted layers. Repeat
step 1~step 3until you get satisfying results (i.e., when the paco classifier is able to predict layers correctly).
Iteration 1
Background Removal.
This step uses the background_removal job to remove the background of an image. It provides two methods to do background removal: using Sauvola's Threshold or SAE binarization. In this example, we use Sauvola's Threshold and its default settings.
The result looks like this:

Pixel_js
Manually label a small region and move pixels inside the region into layers.
In this step, we manually labeled pixels inside the output of the background_removal job.
Say we want two layers: neumes and staff, we need three input ports in Pixel_js job:
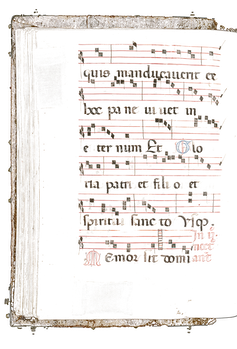
Image: this is the manuscript we sent to theBackground Removal.PNG-Layer1 Input: this is the output port (RGBA PNG image) of theBackground Removaljob.PNG-Layer2 Input: this ise optional output portEmpty Layerof theBackground Removaljob. InPixel_js,this is simply an empty layer.
Background Removal only removes the background of an input manuscript, which means that all the neumes and staff we care about are still inside its output (RGBA PNG image). So say we want neumes in the first layer and staff in the second layer, our task is to move all the staff inside the pixel’s first layer (PNG-Layer1 Input) to the second layer (PNG-Layer2 Input).
Before we get our hands dirty in doing this, make sure we crop a region first and only label pixels inside that region!
After labeling pixels inside a region, Pixel_js automatically generates an additional background layer for you. All the outputs (Image, generated background, labeled neumes, labeled staff, cropped region) are packed into a zip file. We recommend not opening and modifying the zip file!
This is an example of the complete workflow for Pixel_js
Before we do the labeling job by hand.
<PNG-Layer1 Input> contains <neumes> and <staff>.
<PNG-Layer2 Input> contains nothing. It's just an empty layer.
We want to keep <neumes> in the first layer and <staff> in the second layer.

When working on Pixel_js:
1. First, we crop a region.
2. Second, go to <PNG-Layer1 Input>. Move all the <staff> to <PNG-Layer2 Input>.
3. We only have to work on the cropped region.

After our labeling job:
<PNG-Layer1 Input> contains <neumes>.
<PNG-Layer2 Input> contains <staff>.

Then Pixel_js prepares a zip file for you that contains:
<Image>: The original manuscript.
<rgba PNG - Layer 0 (Background)>: This is the background that Pixel_js generates for you.
<rgba PNG - Layer 1>: This layer is labeled by us. It contains <neumes>.
<rgba PNG - Layer 2>: This layer is labeled by us. It contains <staff>.
<rgba PNG - Selected regions>: The region we cropped.
We do not recommend opening this zip file.
Training model of Patchwise Analysis of Music Document, Training
Train models with the zip files from Pixel_js.
- Job Name:
Training model of Patchwise Analysis of Music Document, Training - Category:
OMR - Layout analysis
This step uses Training model of Patchwise Analysis of Music Document, Training (Paco Trainer for short) that takes the output (zip) of Pixel_js as its input and generates several neural network models to classify pixels into different layers. The number of output models equals the number of input layers to Pixel_js + one additional background layer generated by Pixel_js
Here we'll reuse the example workflow in Pixel_js. In the Pixel_js's example we input two layers: <PNG-Layer1 Input> and <PNG-Layer2 Input>, and labeled them as <neumes> and <staff>.

Since #output models of <Training model of Patchwise Analysis of Music Document, Training> is #layers + 1, in this example, #output models will be 2+1=3. We get three trained models: one for background generated by Pixel_js, one for labeled neumes, and one for labeled staff.
Training model of Patchwise Analysis of Music Document, Classifying
Use your trained model to classify more manuscripts.
- Job Name:
Fast Pixelwise Analysis of Music Document, Classifying - Category:
OMR - Layout analysis
This step uses Training model of Patchwise Analysis of Music Document, Classifying (Paco Classifier for short) job. It uses the trained models from Paco Trainer to classify pixels of an input manuscript into layers.
The input for this job is a manuscript that we’re going to classify and generated models from Paco Trainer. The outputs contain a log file andrgba images corresponding to each predicted layer’s pixels. See Training model of Patchwise Analysis of Music Document, Classifying for details.
Iteration 2+
For 2+ iterations, the workflow Paco Trainer and Paco Classifier is the same. The only difference is the Background Removal and Pixel_js.
Basically, in 2+ iteration, we don’t need the Background Removal job anymore. The predicted layers, output Layer<i> from Paco Classifier of the last iteration, are the input layers (PNG-Layer<i> Input) to Pixel_js. So we correct the predicted layers from the trained model of the previous iteration, send all zip files we’ve used in the previous iteration to the Paco Trainer job, and add the new zip file that we’ve just corrected using Pixel_js.